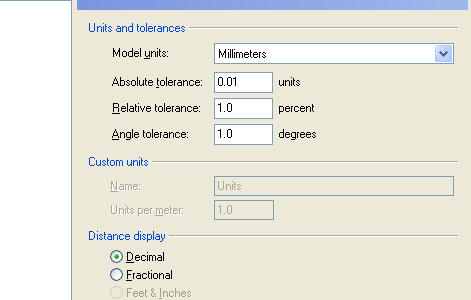
1. Start a New file using the Millimeters template
2. Open the DocumentProperties dialog.
3. On the Units page, set the tolerances as shown.
Getting Started

1. Start a New file using the Millimeters template
2. Open the DocumentProperties dialog.
3. On the Units page, set the tolerances as shown.
Choice of tolerance can have a big impact on how much trouble you’re going to run into with modeling and with downstream operations if manufacturing is your goal. The tolerance chosen here is fairly "relaxed," to avoid unnecessary hassle.
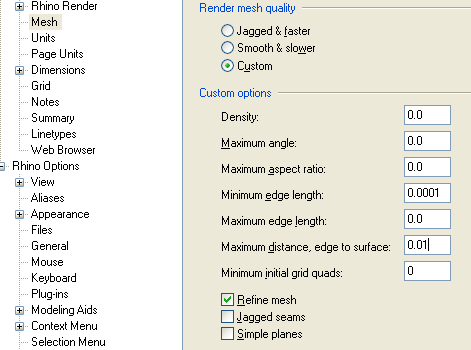
4. Go to the Mesh page, select Custom, and try these settings. You may want to adjust them based on your
horsepower.
Optimum meshing settings can vary greatly from project to project, even for different objects in the same project. These settings make it easy to drastically change the polygon count by adjusting just 2 values, Min edge length and Max dist, edge to srf, and on this particular object do a good job of capturing subtle surface contours with a low polygon count, albeit at the expense of the accuracy of tiny details like fillets[illustrate]. Greater accuracy would be required for STL output, but reducing the polygon count in long skinny surfaces (like fillets) is key to improving the speed of your shaded views.
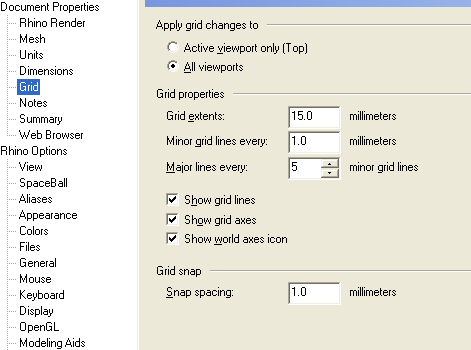
5. On the Grid page, set these options.
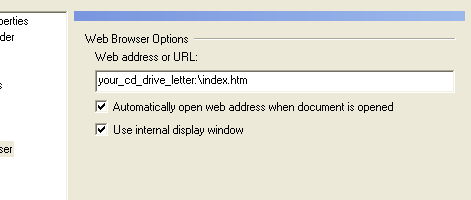
7. On the WebBrowser page you can associate a web page with a file that you can view in a browser window "on top" of Rhino. To use this feature, enter the location of the tutorial index, which would be "your_CD_drive_letter:\index.htm" and check the options as shown. The next time you open the file, the tutorial will "pop up" in it's own window.
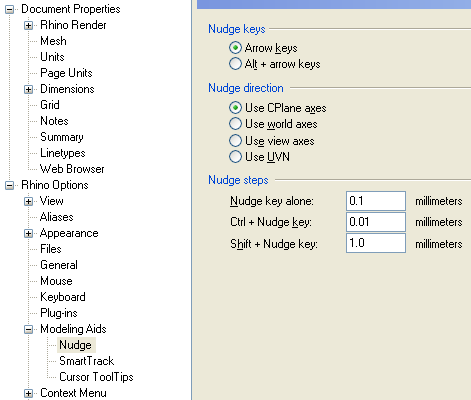
8. On the Nudge sub-page below the Modeling Aids page, adjust the nudging settings as shown. Exit the dialog.